
From December 2023, I actually started making parts from wood. I had ambitions to be done by March 2024 to participate in Leipziger Buchmesse, one of the biggest events relevant for cosplayers. We'll see how that went.
It did not go as planned.
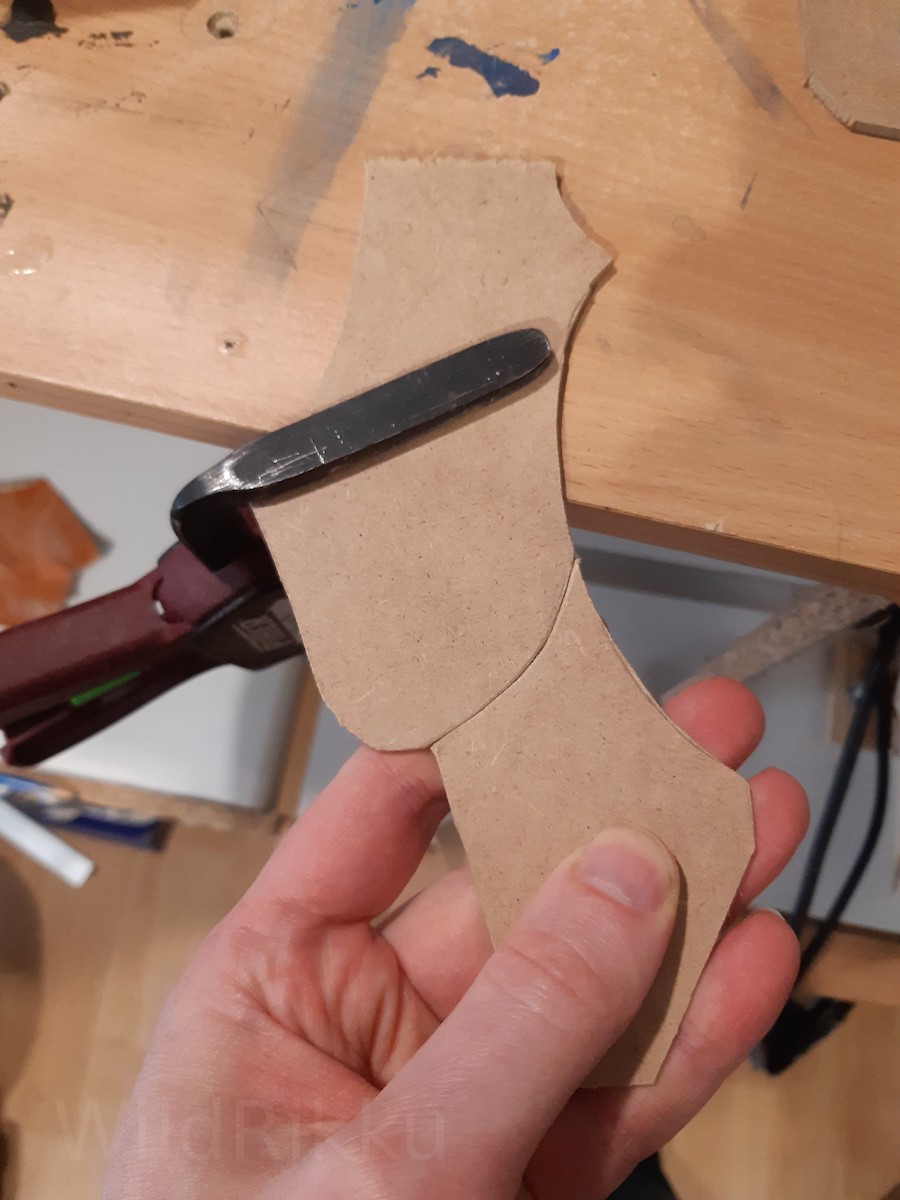
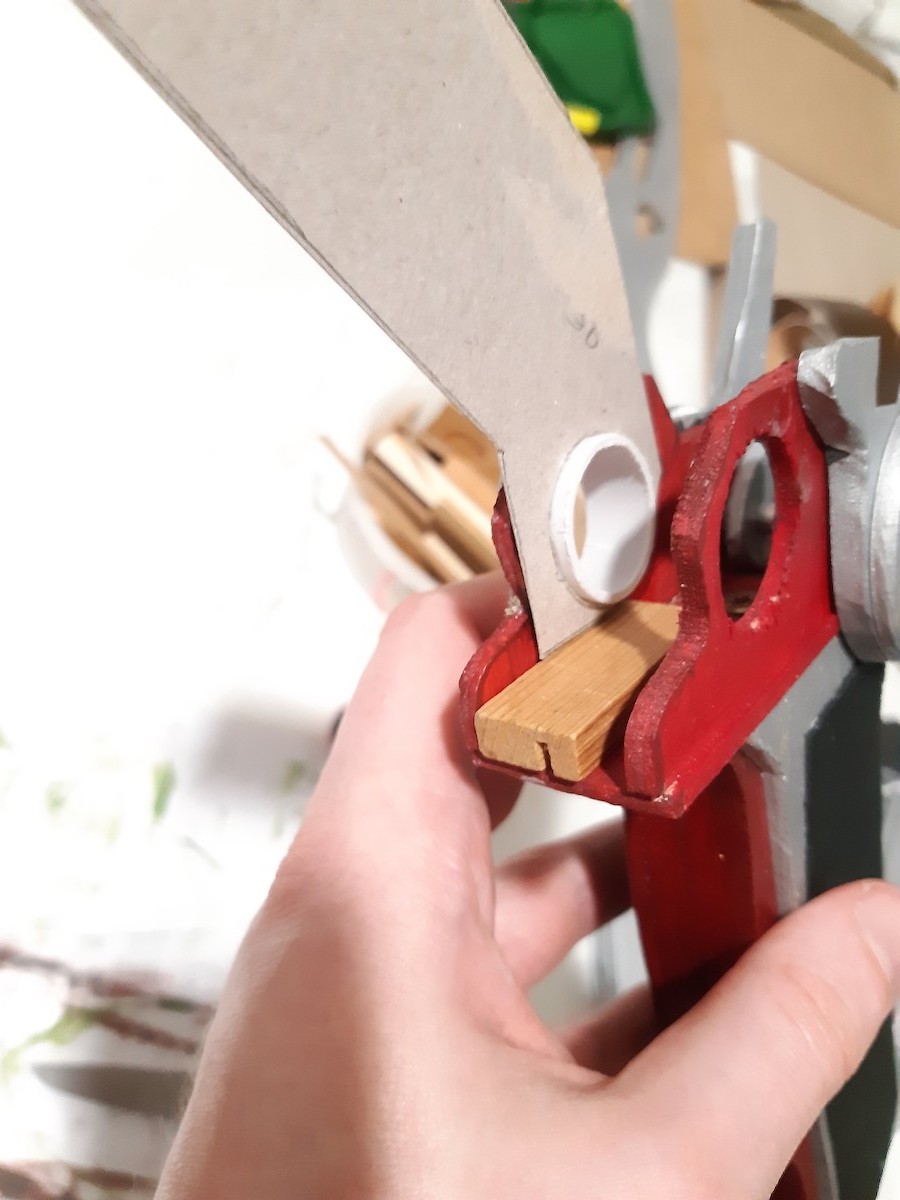
In the last two articles, I described how I figured out the gunblade's motion and parts. I had, however, not built a single part yet. I was convinced that actually manufacturing the parts would be the smallest problem (and I was not completely wrong about that), so I focused on all the problems first. The photo shows that I came up with a method to make two parts that need to fit together perfectly but also need to be separated. It's a common woodworking problem: When you use a saw to separate, you'll take away material and the resulting parts will not fit, but if you draw and cut both parts separately, you'll probably not be precise enough. I figured out that at the scale I am operating at, it is reasonable to use a hand saw, and hand saws can have really thin blades, removing so little material you can barely see it.
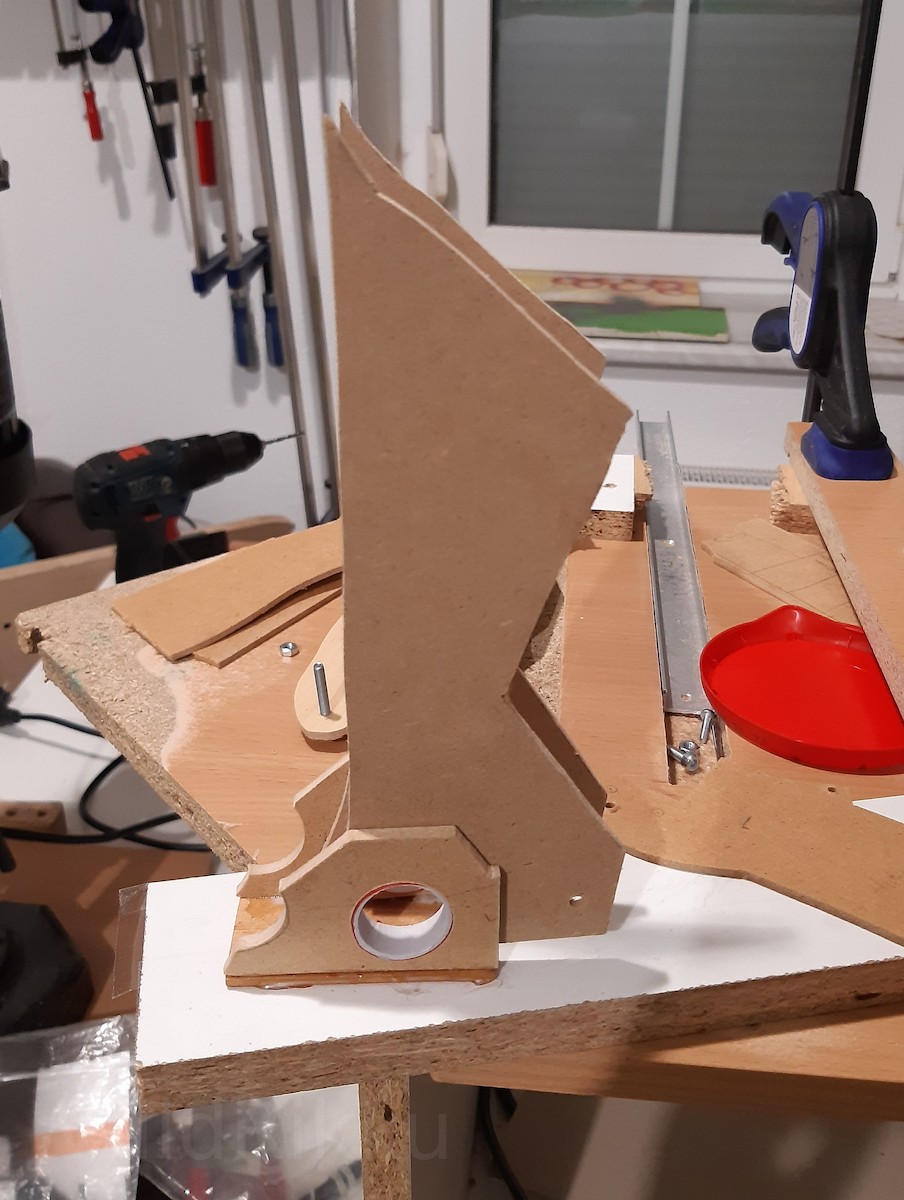
When I started to actually make some parts, there was one big problem left (that I was aware of at the time): the base. All the moving parts need to attach to something and you may or may not have noticed in the previous post about the axes that some parts more or less float. In my discarded CAD model, the base had some crazy notches to allow the sliding pieces to slide; I have given up on that. This would require metal works of insane precision and detail1. I went with magnets instead, so I could detach, rotate and move the pieces manually.
However, I still needed to make a base that would: a) hold all the pieces in sword form, b) hold all pieces in gun form and c) be visible / invisible the right amount in both forms, while moving itself, too. Parametric CAD wasn't the correct tool for that, so I went with something simpler I already used: Paper. I placed the parts I already had on paper, copied their contours and then drew onto that. Later, I also scanned the drawing and used Inkscape to be able to iterate more quickly.
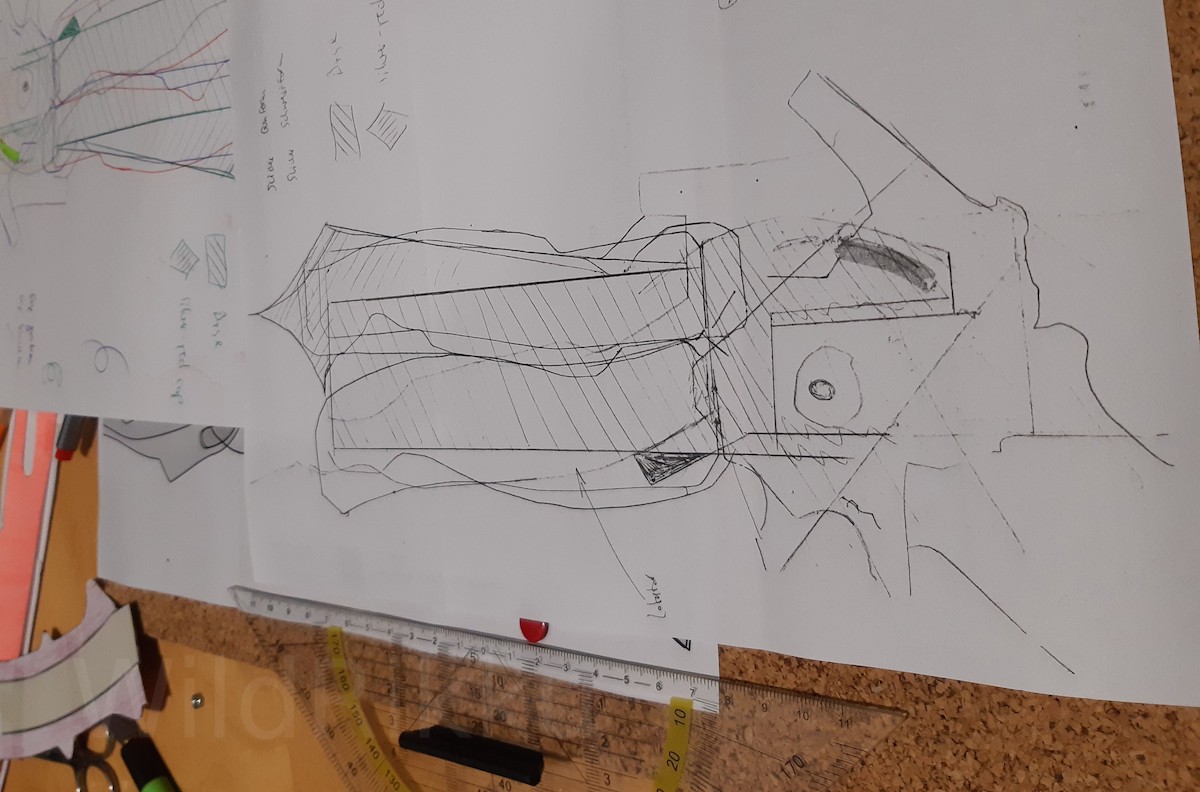
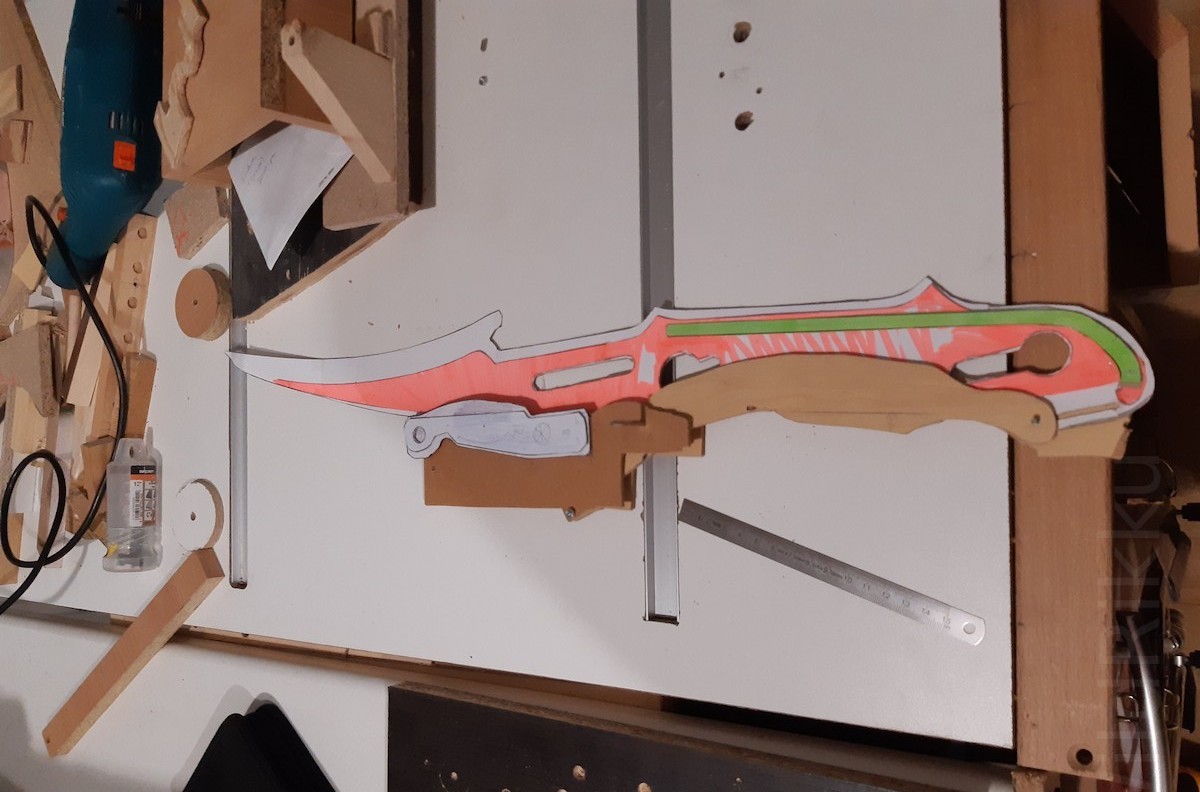
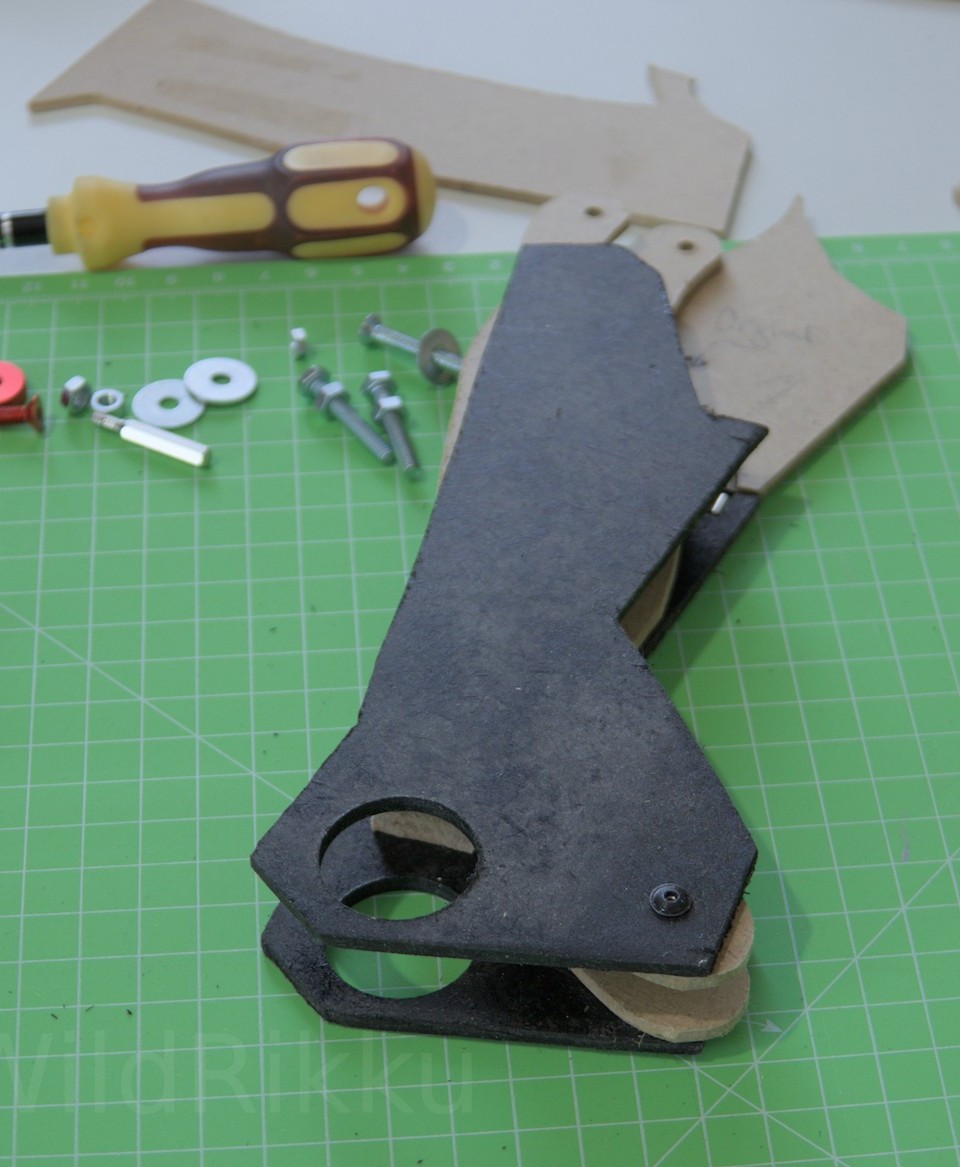
I figured out that there was indeed a shape that I could hide in sword form, expose as intended in gun form and attach to all the parts in both forms just barely. Initially, it still included a part that was supposed to disappear in the hilt. I discarded that design since it also required the attachment point to the blade to move. You can see an attempt to do that in the second photo; the darker wood part has a weird curved thing coming out to the right, that would have gone into the hilt. And where the lighter wood part connects to the cardboard part, you can see a noth in the cardboard that would have allowed for the axis to move. This was way too complicated. Even without both these aspects, it already took a few tries until I had a working prototype. Some were related to the axes, others were related to the part visible in the very first photo of this blog post, which needs to be detachable (and ended up being one of the last parts I made, months later than everything shown in this post). After a couple iterations, I also made some changes to make the thing easier to manufacture exactly. Ironically, the first version I made with the improved process was the one that actually made it into the first build I took to a convention (Dokomi 2024) - the magnets fell off and I had to hot-glue-fix it last minute, but it worked. Here's an assembled version without the magnets and magnetically attached parts, shortly before taking it to the convention:
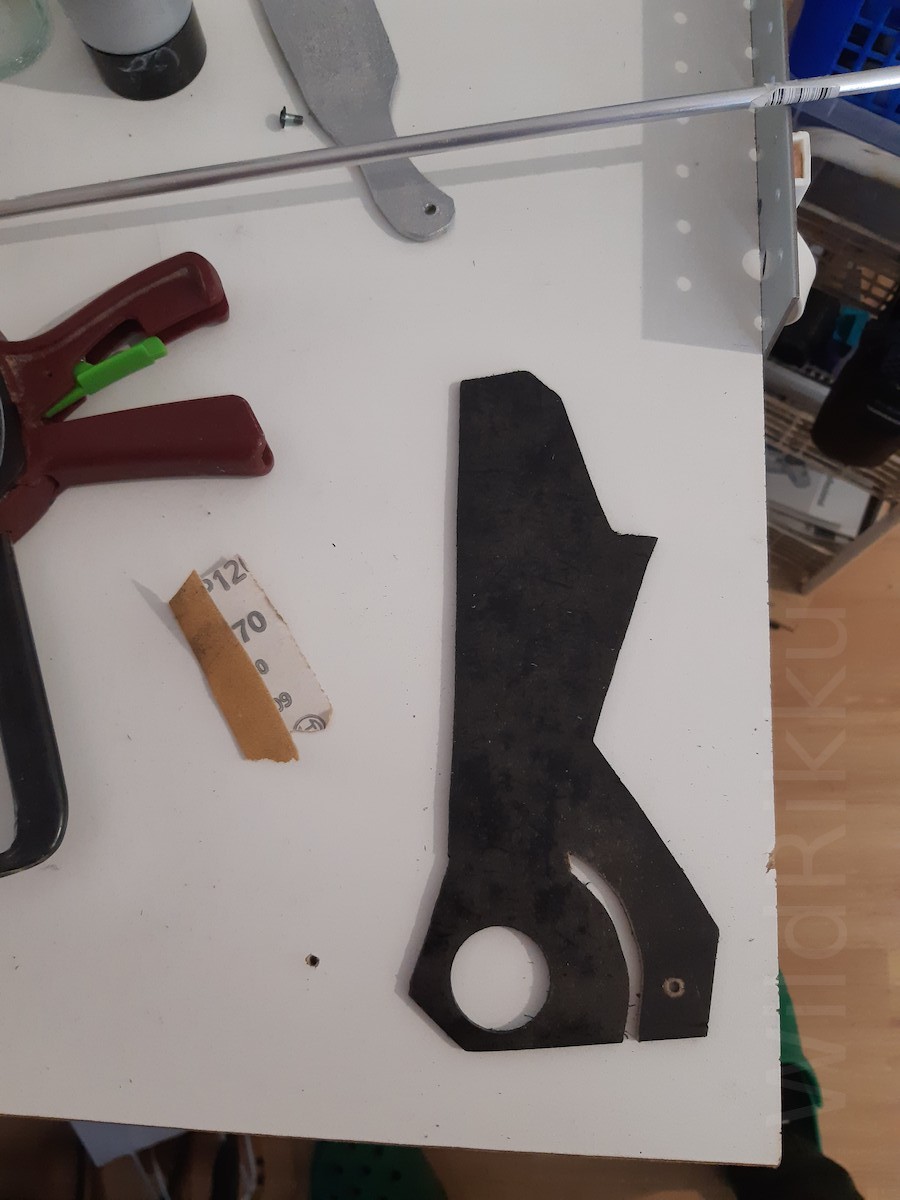
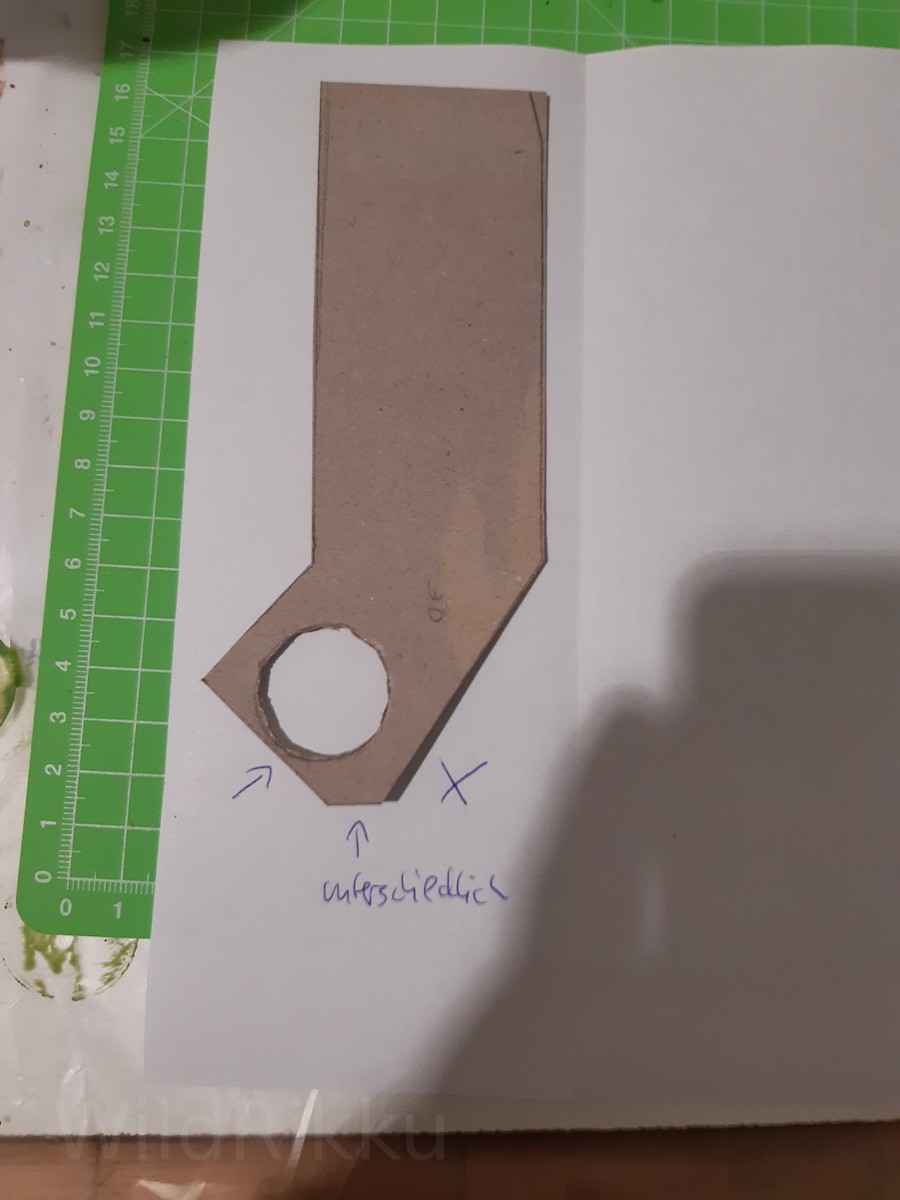
Here are some more versions that I discarded. The first two show attempts to come up with something to attach the piece shown in the very first photo in this post. They were way too complicated to make. The third one is from a time where I didn't have the axes figured out yet - another variant with a notch where parts would slide, similar to the notch in the blade shown further up. Fortunately, I figured out the axes in time, allowing me to get rid of all the complicated versions of the base.
The version I took to Dokomi wasn't easy to use though since I could not grab it anywhere. It also rotated all the time and did not keep it's position. So I figured I needed a stopper to prevent rotation, and I could make one by ensuring that the distance between the base and the hilt is the same in both forms.
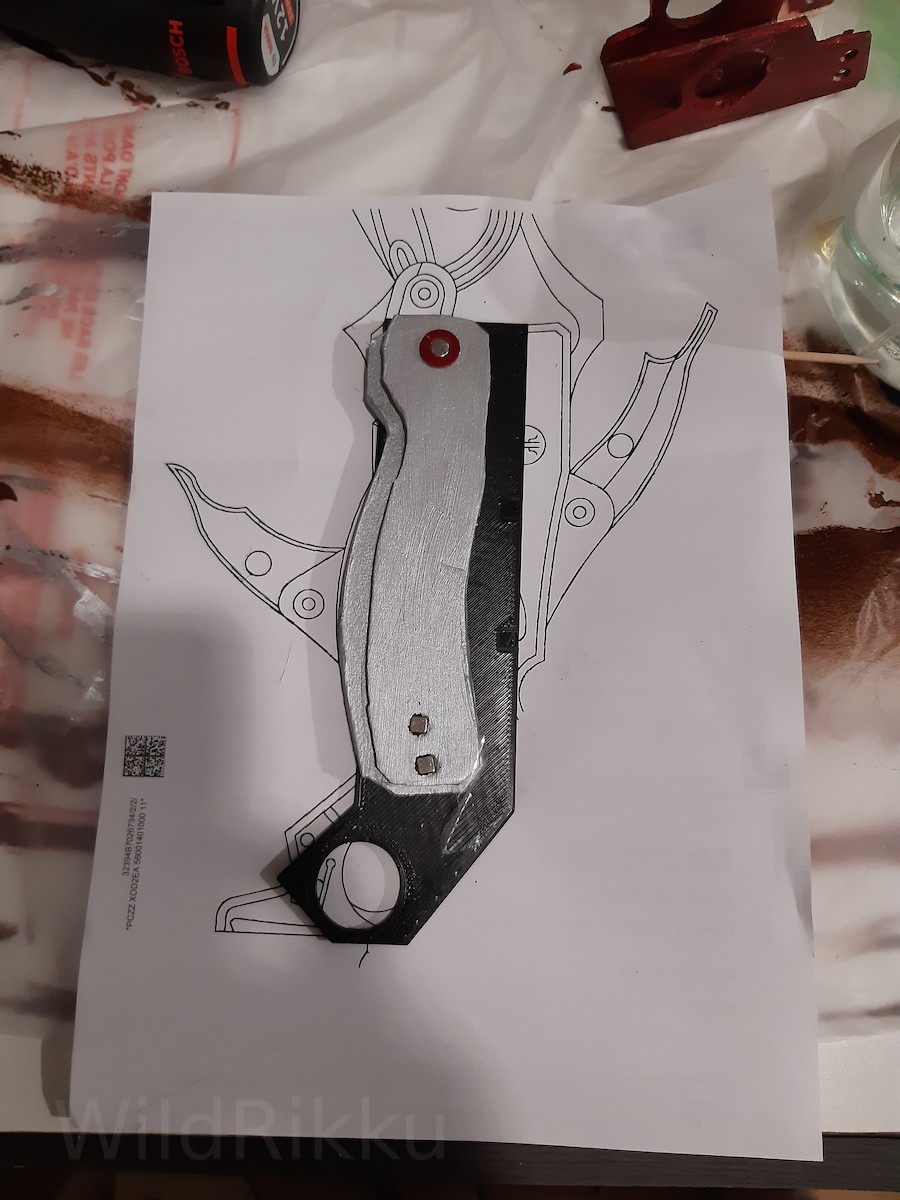
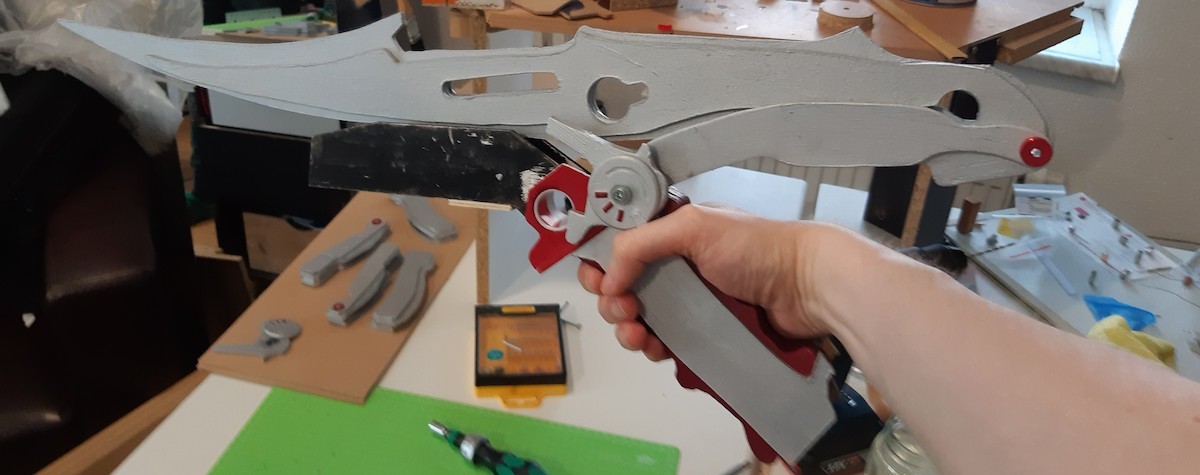
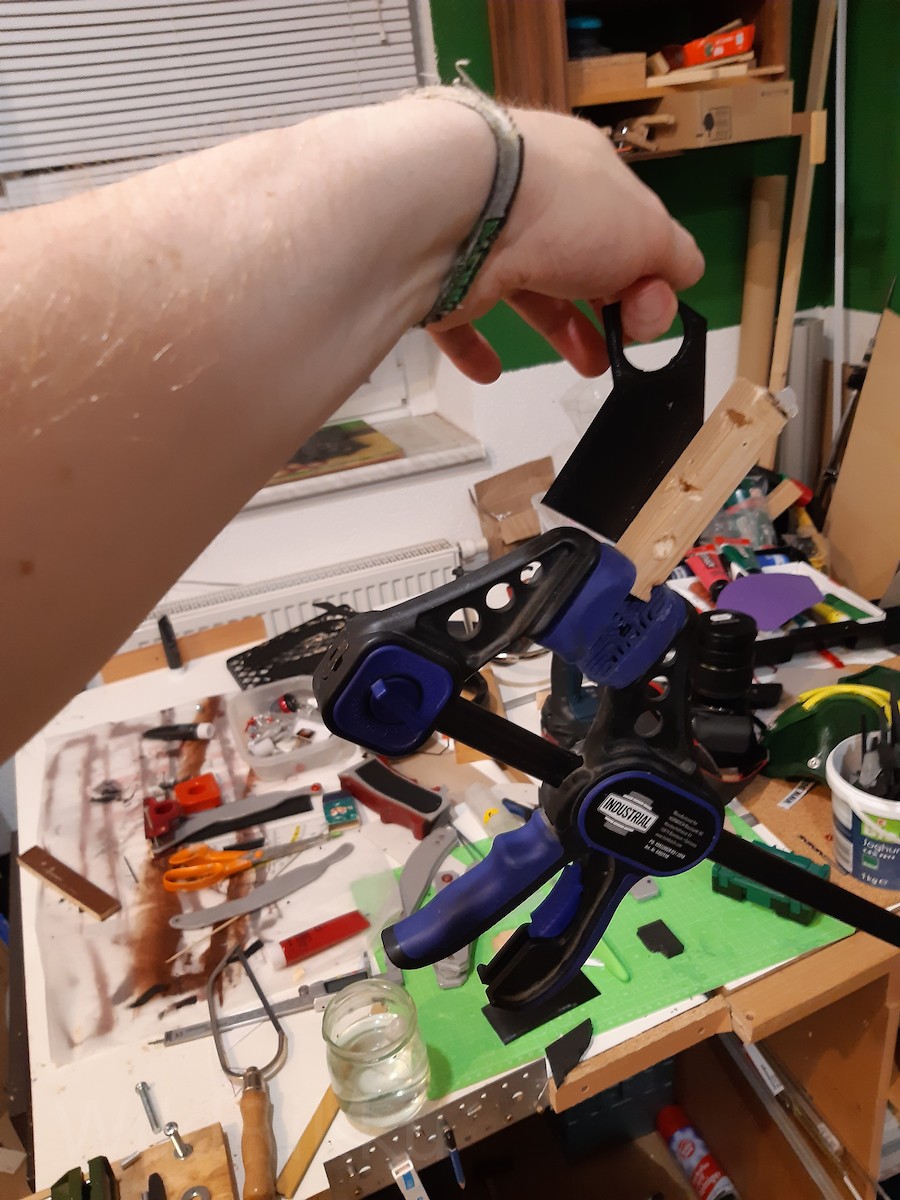
I was pretty satisfied with this solution, it worked great with the prototypes. So I spent most of my time on the costume, which was also far from done. Two months later, shortly before Gamescom, it was time to make the new version of the base. The day before Gamescom, it broke. I had not factored in that my redesign had reduced the material thickness around the main axis, so the wood could no longer withstand the forces. I panicked, then remembered I had recently bought a roll of black ABS filament because a friend had asked me to print something for him. It was the only black filament I had and I didn't want to use white PLA. I quickly converted my Inkscape drawing to a printable 3D model and gave it a try. I had never printed ABS before, but for whatever reason, it worked. You can see it in the third photo above. Relieved, I remembered that I also needed something to grab the base, so I modified the base once again and added a little handle on the left side. Between the two bases' handles I would then glue another decorative element. You can follow that redesign in the next three photos. The decorative element is the silver part with the red ring and the black spike. These were the only ABS prints that ever came out of the printer in an acceptable shape - I did not manage to print a single object with ABS ever again, not even the same part. In an unrepeated crunch, I also sewed some parts onto the coat while the printer was running and cut, drilled and painted the aforementioned decorative element. Then I went to Gamescom 2024.
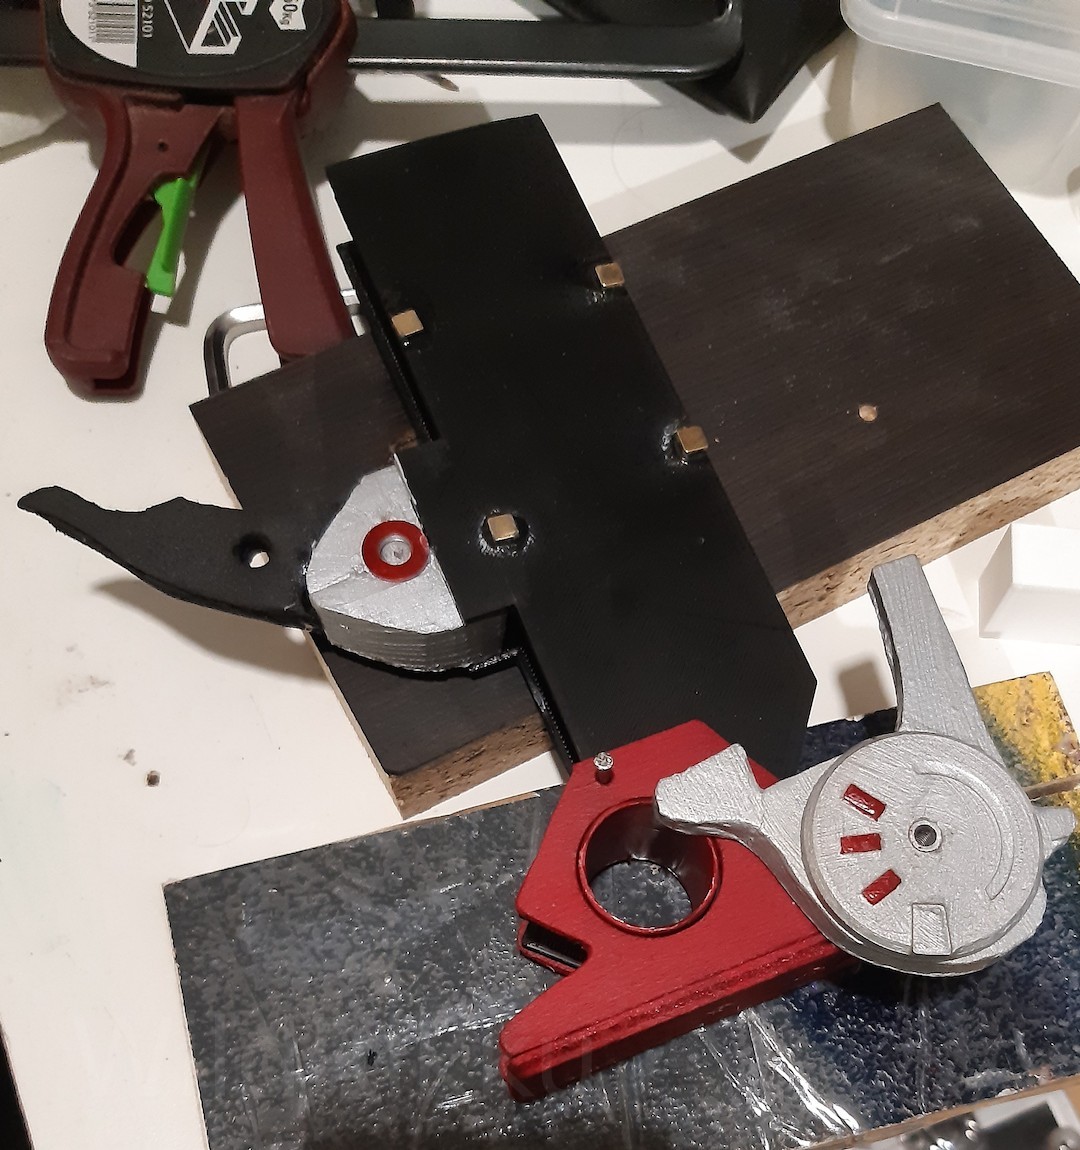
The gunblade would not be finished until after Gamescom 2025, over a year later, but regarding the base, the ABS version was almost final. To further simplify locking the rotation of the main axis, I removed the wooden block shown above and instead added stoppers for the two positions to the base. I also optimized the positions of the magnets a couple times. Then the contact cement I had used to attach the spike to the "handle" dried and became unusable, so I added screws to the handle part, which also made testing and assembling a lot easier. The base was now PLA since the ABS refused to cooperate, but I still did not want to have to print a new pair every couple iterations. The last thing I added were some holes that I drilled to put in pins since I never fully managed to solve the problem of parts rotating out of position on their own.
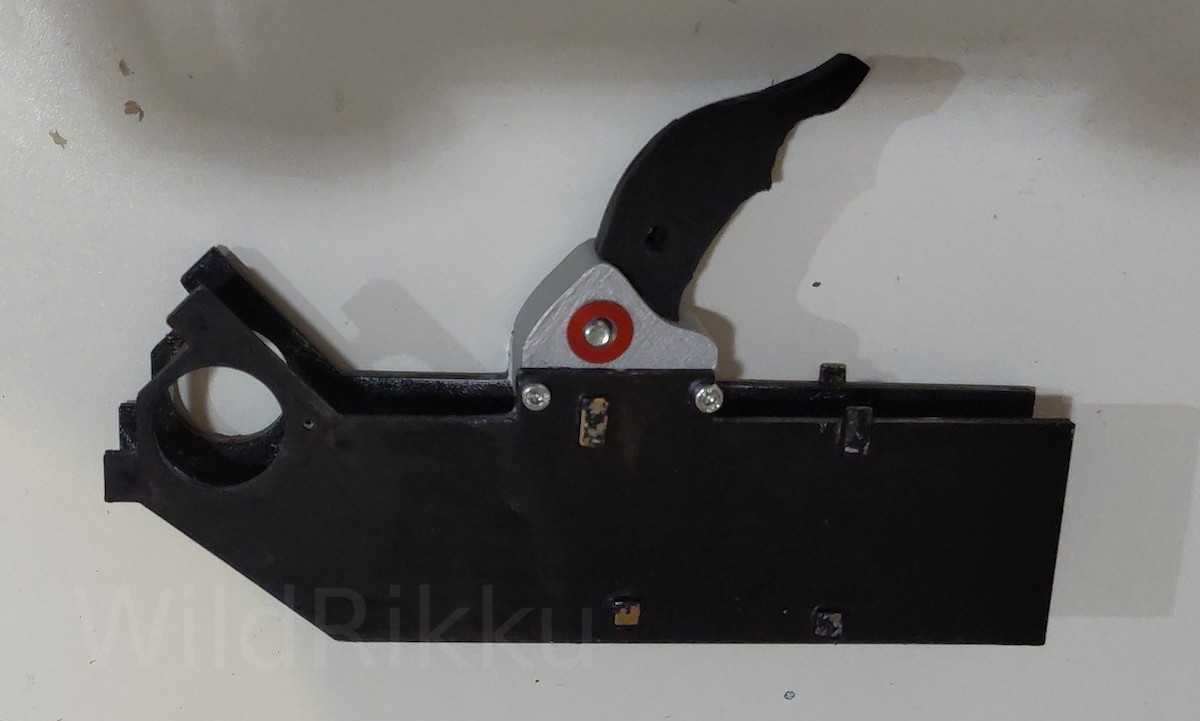
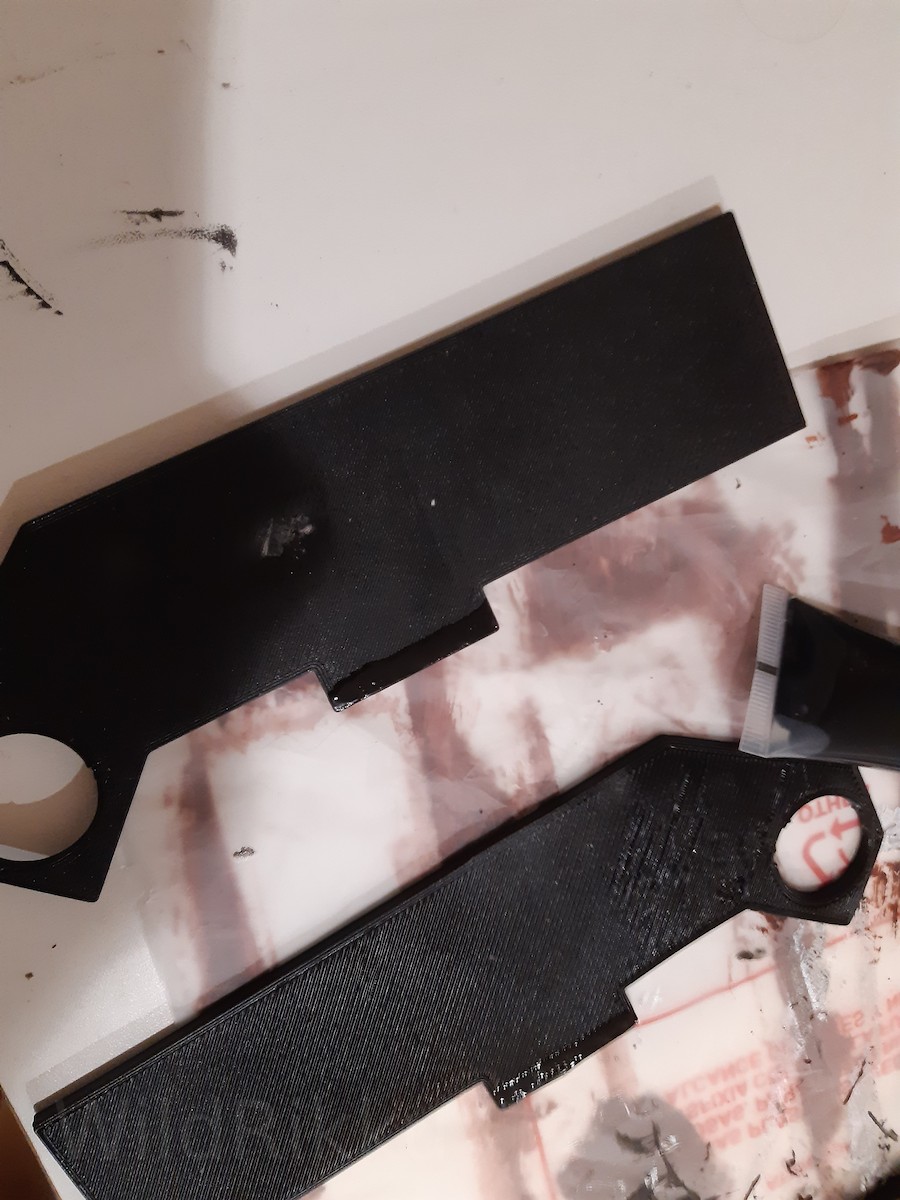
From the cardboard prototypes to the final thing, the base underwent more iterations than all other parts combined. The last photo shows the final version: You can see the stoppers, the screws in the handle and the new spike, that I also redesigned (which is a whole different topic). You can also see the paint keeps coming off. For the magnets, this is not relevant, but for the base, I switched from acrylic paint to spray lacquer to at least not have to repaint it after every con.
I would still like to inset the magnets to the base and the decorative parts to reduce the overall width, but as further posts will show, I already had lots of other things to work on before calling the gunblade complete.
-
At the time of writing this blog post, someone named tehxeri made such a version for his cosplayer sister CrystAAHHL. I had seen his prototype in my initial research, it was like eight years old and I thought he had abandoned the project. He hadn't. While I worked on the things I describe in this blog post, he was still working on it, and some time later published a new video. It's the most fucking impressive thing I have seen. We had a chat, he's really nice and we quickly figured out that our approaches to building the gunblade are completely different: I want to stay true to the optics in the artwork and the parts visible in the game, while he wants to mimic the motion as perfectly as possible. The result is a finicky fragile piece of metal work, but I think he nailed it. Check it out in CrystAAHL's Youtube shorts, there's multiple videos including fails. ↩
--
You can receive new blog posts using a feed reader and my Atom feed. If you want to talk to me, you can do so in the Fediverse. I am on Mastodon and Pixelfed. Please feel free, I like to have a chat!